Showing posts with label trout. Show all posts

Tuesday, April 26, 2016

The Ramps Report 2016


Those of us who have been tuned in to the world of local and seasonal eating for a while probably have a complex, somewhat complicated relationship with ramps.  Those “wild leeks” of springtime that have perfumed loamy woodlands and Appalachian kitchens for generations in relative obscurity leapt into the culinary limelight 20 or so years ago, and have been hogging center stage ever since.  I recall seeing them mentioned more and more often in reviews of New York restaurants in the late 1990s, then noticing them for sale (at what seemed like an exorbitant price) in Twin Cities food co-ops, and then came the big Ah-ha! moment when, walking the banks of a favorite trout stream, I was brought up short by a powerful garlic-chivey smell and looked around to find that I was standing in a veritable field of ramps, their crushed leaves under my wading boots sending up what was, to me, an incredibly appetizing aroma.


Thus began my journey along what one might call the stages of grief/stations of the cross for ramp lovers in the foodie 21st century.  Fascination and infatuation at first meeting, then falling big time for this humble but compelling new crush; then the skepticism, eye-rolling at the sudden bandwagoning crowds, the farmers market shoppers clamoring, the fancy chefs pandering; disillusionment—was I a fool to fall so fast, so hard, for a love that had turned fickle and trendy?; then acceptance: hey, it’s a stinking wild onion, it’s delicious, and when you pick it yourself, it’s free, and ridiculously abundant when you know where to look—get over it. 


I’ve reached acceptance now, indeed, a state of near ramps nirvana, if you don’t mind my mixing gastro-religious metaphors in reference to a common woodland weed.  I went fishing with my friend Tom during Minnesota’s opening weekend for the regular (i.e., kill ‘em & grill ‘em, hook ‘em & cook ‘em) trout season a week ago Sunday, and while the fishing was pretty good, the foraging was even better.  The warm start to spring meant that the ramps were already well up and sizable.  We each took home a sack, and I’ve been cooking with them nearly every day since.

Opening weekend trout stream rice bowl with ramps, cress, and of course, trout, brown.

While I’ve come up with a number of ramp-specific recipes over the years, now I tend to treat them like any other allium (that is, onion or lily family member, ramps being allium tricoccum), as a versatile aromatic.  So I’ve sautéed them to build a nice base for ramen stock, thrown a handful into a quesadilla, strewn slivers atop a pizza, sweated with other aromatics to flavor a pilaf—you get the idea.


Yesterday I did a little pickling, putting up one pint of ramp bulbs per this versatile method, setting a quart to ferment in a simple salt-water brine.  Looking through my blog index I find that I might have more recipes involving ramps than just about any other ingredient.  As far as that gnarly, evolving relationship with ramps goes, I guess I’m fully committed.


Charred Ramp and Watercress Soup


I used Madeleine Kamman’s cabbage cream soup as a template.  Serves 2 as a main course, 4 as a starter

2 ounces salt pork or pancetta, in 1/3” dice (or 2 tablespoons cooking oil)
10 good ramps, well cleaned
1 small potato, about 4 ounces, peeled, cut in small dice, and rinsed, and well drained
4 cups loosely packed watercress (about 4 ounces), leaves and stems, well rinsed (especially if it’s wild cress) and roughly chopped
3 cups chicken stock
Salt and freshly ground black pepper

Optional garnish: croutons, good yogurt, cream, or thinned sour cream

Separate the ramp greens from the stem-bulb sections and set aside.  Slice the stem-bulb sections crosswise into 1/4-inch pieces.

If using salt pork/pancetta, render the pork cubes gently over medium-low heat until they have given up much of their fat and started to brown.  Remove the cubes from the pan and set aside.  Pour off—but save!—the fat, and return 2 tablespoons to the pan.
If you don’t have salt pork or pancetta, heat 2 tablespoons oil.

Turn the heat to medium-high and add the chopped ramps, then the potato.  Cook, stirring frequently, until the potato begins to brown and the ramp pieces take on color—indeed, we are looking for some of the ramp bits to become quite dark, even black.  Just don’t burn the crap out of it so it all turns ashy and bitter.

Getting good color.

When the potato is golden, the ramps nicely colored/charred, add the chicken stock, then the cress, a couple good pinches of salt, and a few grinds of pepper.  Bring to a simmer, cover, and cook at a gentle bubble for 10 minutes, stirring occasionally.

Chiffonade (cut in thin ribbons) the ramp greens, and add half of them to the soup at the end of the 10-minute simmer.  Let the soup cool for a few minutes, then purée, using either an immersion blender, a regular blender, or, with great care and caution, a food processor.

The soup can be made to this point up to several days ahead.  Just before serving, reheat the soup and serve garnished with the recrisped salt pork/pancetta cubes, croutons from good, honest bread, perhaps a swirl of yogurt (I’m fond of goat yogurt), and the remaining ramp leaf chiffonade, or as you please.


Text and photos copyright 2016 by Brett Laidlaw

Thursday, April 30, 2015

We Smoke Our Own, 2015 edition


In the spirit of re-embracing that cyclical, perennial essence of the natural world of which food—real food—is a part, it’s probably worthwhile to take up again the basics of home smoking.  Brown trout are on the roster here, but the same basic principles apply to pretty much any kind of smoking.  To take away any stigma of the arcane or difficult about the process:  hot smoking, which is what constitutes the vast majority of home smoking, is simply indirect grilling at a fairly low temperature while adding smoke.

Trout, having been brined.

First you obtain a piece of flesh, then you cure it with a brine or a rub, next you build a fire, finally you cook that brined meat in low, smoky, indirect heat until it is well saturated with smoke, and cooked through.  It doesn’t really matter if it’s fish, pork belly, pork shoulder, chicken, venison, beef brisket.  If it’s something that spends a relatively short time in the smoke, like fish or bacon, we call it smoking; if it takes many hours to do the job, we tend to call it barbeque.  Same basic process.

So as not to overlook the obvious:  cooking with indirect heat simply means the meat is not sitting directly over the coals, as it would be when you grill a steak or a burger.  The coals are on one side of the grill, the meat on the other.  Simple as that.

Fish at the back, coals in the front.

The only difficult part of the task, in this age of constant distraction, is remembering to get your meat brined a day or two ahead, depending on size and what exactly you’re going for.  With these brown trout in the 12-inch range, an overnight wet brine is plenty.  My basic fish brine consists of 2 tablespoons each of salt and brown sugar per cup of water; that translates to ½ cup each salt and brown sugar/1 quart water.  I start with hot tap water, add the salt and sugar, stir to dissolve, let it sit until cool (or if impatient add a few ice cubes).

An instant-read thermometer stuck through the top vent gets you close enough.

The next morning, the fish sit out on a rack to dry a bit before being smoked.  In a smoker—just a regular home bbq grill, Meco my preference—maintained at around 200-250 degrees, the fish will be done in a couple of hours.  When the skin has that gorgeous reddish-gold smoky hue and the flesh feels firm to the touch, they’re ready.

For most people, the natural chunk charcoal (such as Cowboy brand) that’s widely available now will be the best choice for a heat source.  Briquets can be used in a pinch, I guess, but for god’s sake don’t start the fire with lighter fluid.  It kind of amazes me that they still sell that stuff.  A chimney starter is the way to go.

Foreground, grill purification by fire; background, why we don't buy charcoal.

These days I build a fire with local oak and use those coals as my heat source, usually adding apple wood for the smoke--the oak coals bring their own distinctive smokiness, too.  The apple wood is also locally harvested, and I just use whatever pieces are easy to obtain.  A lot of smoking guides tell you to soak your wood chips, if that’s what you’re using, and I suppose if the chips are very small this makes sense, but in general I don’t think it’s necessary; you’re trying to make smoke, not steam, and soaked chips are just going to steam until they finally dry out and burn.  I’m all for cutting out superfluous steps embedded in common practice by constant, unthinking repetition.

Smoked browns with celeri buttermilk rampoulade.

In general, I smoke food for the flavor—and other delectable qualities—it imparts, rather than for preservation.  With stream trout, though, extending the delicious life of the fish is part of the reason for smoking.  A fresh fish is good for four or five days (and sometimes actually improves with two or three days aging), while smoked fish will keep for two weeks or more.  I don’t feel that smoked fish freezes very well—when it’s thawed it can be watery, with a grainy texture.  Better, I think, to freeze fresh fish and then smoke it afterward, if you so desire.


Smoked trout can be a centerpiece of a plate, rounded out with a couple of salads.  And it’s a great ingredient for chowder, and appetizer spread, fish cakes, smoky trout brandade…. Many possibilities.  If you’re not a fan of the angling arts, or trout are out of season, you can always buy farmed rainbow trout, a sustainable product, and a tasty one, at that.  Also, this same method can be used with other kinds of fish—I’ve done it with Lake Superior herring, whitefish, and lake trout. 

There’s just a lot of satisfaction in smoking your own.  Have a try.

Tuesday, April 21, 2015

Back to the Stream 2015


I inaugurated the 2015 fishing season on Sunday with a trip to the Whitewater region of southeastern Minnesota.  It has become my tradition over the years to make a trip or three to Minnesota waters in the second half of April.  The regular (i.e., catch and kill, rather than catch and release) season in Minnesota opens a couple of weeks earlier than in Wisconsin, which opens for hook ‘em & cook ‘em the first Saturday of May, Kentucky Derby day.  Both states have lengthy catch and release seasons during the winter and early spring months, and some years ago I did fish Wisconsin streams in April.  You can have some impressive days of catching fish if you come upon an early mayfly, stonefly, or caddis fly emergence.  Also, it just seems that the fish are less wary at that time of year, maybe because there hasn’t been too much to eat over the winter.

But I have eschewed the early season fishing in recent years because I don’t agree with the catch and release “ethic.”  As much as I appreciate all the aesthetic aspects of flyfishing for trout, I’m a meat fisherman at heart, and I don’t like the “moral” distinctions that some catch and release advocates apply to the legitimate choices available to those who practice this pastime.  So I generally back up my position by not stringing up my rod unless there’s a legal opportunity to put a trout or two in my creel.  Which is not to say I won’t waver in my convictions on some bluebird day during the early season, maybe even next April; or indeed that I won’t find a principled justification for poaching the odd trout.  You just never know.  It pays to keep your options open.

I hadn’t been planning to round up the gear and head for the stream on Sunday, but when I looked at the week ahead it suddenly seemed like one of the few days I would be able to get away.  We have this new little creature in the house, a nine-week-old griffon puppy named Gracie, and she’s pretty high maintenance.  Actually she’s a sweetheart, and worth all the trouble (so far), but with Mary away at work part of the week, I knew I would have to be around the house, and then there were other obligations on other days…. It’s just really unconscionable that life often shows so little regard for fishing.

Sunday was actually looking like a prime day for fishing—overcast and spitting a bit, but not too cold or windy, and no downpours in the forecast.  My only reluctance arose from the fact that the Minnesota trout season had opened just the day before, and opening weekend can bring out crowds of fisherfolk who in those conditions do not always display the finest aspects of their nature.  Still I figured it would be worth a shot in the slightly rainy conditions; with some years of experience on southeastern Minnesota streams, and a little patience, I thought I’d be able to find some quiet water to fish.

There weren’t many vehicles parked along the branch of the Whitewater River, a nice surprise.  But when I reached the DNR lot in the wildlife management area through which the river flows, six vehicles had beaten me there—not much of a surprise there, since it was already late morning.  I hesitated only briefly.  There were miles of river upstream from here, with no easy public access.  It was also likely that some of the vehicles had arrived together for an opening weekend gathering, and so the fishermen would be clumped.  And then, if nothing else, it was a pleasant enough day for a walk in the woods.  I was pretty sure the ramps would be up, and so I would find something edible to take home.

I’ve been fly fishing for 25 years now, so recalling how to put a rod together and tie on a fly is not difficult, even if I haven’t done it in the last seven months.  I walked in waders, wading boots, vest, and a faded Badgers baseball hat down the rutted two-track with a steep wooded hill on my right and a stubble cornfield on my left.  Beyond the cornfield, across the river, limestone bluffs aspired, with birches, pine, and aspen on their flanks.  It’s a spectacular valley, and there are many good reasons to visit there, but it’s fishing that I know will always bring me back.

I had planned a good long hike to assure myself some undisturbed fishing, but as I came over a rise five minutes or less into my walk, I looked to the left and saw the river through the still leafless trees, and it looked like nice riffle water, and I saw no one fishing it.  My habit had always been to hike well upstream from here, but then aren’t habits made to be broken, I asked myself?  So I made the premature diversion thinking, well, if the hoards descend, I’ll revert to Plan A.  But it turned out to be a good call, with no need for second thoughts.  I fished happily for about three hours, and saw exactly three other people, at a distance.  No one walked into my water, and I did not round a bend to discover a party of raucous metal-chuckers.  It was an opening weekend miracle.

It wasn’t looking like a dry fly day: no rising fish, no apparent insect activity.  I tied on a girdle bug, a simple concoction of black chenille and white rubber legs; and then to a length of tippet tied to the bend in the girdle bug’s hook I knotted on a small hare’s ear nymph, which to the layman’s eye looks like a little brown fur wound around a hook, because that’s pretty much what it is.  Flies don’t necessarily have to be fancy to fool fish.

I waded into the stream in a shallow riffle with a rocky bottom, and as I sensed the water rushing over the top of my boots my blood rushed, too, with a sense of exhilaration.  Fishing writing can easily go over the top with evocations of mystical communion between the fisher and the natural world, but is indeed something of a sense of rebirth when you first step into a river after the long off-season.

Or as Nick Adams might have said: It was good.

Right away then, the fishing proved to be good, too.  Below the riffle where I entered the river the current divided into runs along either bank.  Casting first to the left I had a hit on my third cast, and failed to hook the fish, and then another hit a few casts later, and again my timing was off.  Nothing more on that side, but I was encouraged to know the fish were active, looking for food.  Casting then to the slightly deeper run on the right side, I lifted my arm after my third cast and saw the rod take on that splendid bend, and felt the line go taut, and there it was, fish on for the first time in 2015.

It was a lovely fish, too, a deep, chunky brown trout gold along its flanks, probably a little more than a foot long.  Meat fisherman though I am, I observe a small ritual of always releasing the first fish of the year, so once I had reeled the fish in close I ran my hand down the leader until I could grab the hare’s ear nymph stuck in the side of the trout’s lower jaw, gave it a quick twist and watched the fish turn and dive to safety on the bottom.  I never touched the fish or brought it out of the water.  
  
And from there the afternoon proceeded like…a really nice afternoon of fishing.  The only real negative was seeing several styrofoam worm containers discarded along the streambanks, which was irksome for two reasons--mainly because of the littering, also because this section of river is designated artificials only, no live bait allowed.  (The no worms rule was instituted to support a catch and release fishery, so I should probably feel a little more umbrage about it, if I were consistent.  When a fish goes for live bait it will often completely swallow the hook; this almost never happens with flies or other artificial lures.)

Probably the highlight—which was also, ironically, the biggest disappointment—was hooking a really good fish in a deep run not far downstream from where I started.  I cast across the run and let the flies sink and sweep through, and about in mid-stream my line took a jolt, my rod bent violently, and the reel whined as line peeled off.  I tussled with the fish for a bit, until it moved upstream, took the line down.  As the line went down I also had a sinking feeling.  One moment I was experiencing the thrill of playing a really nice fish; the next I was still standing there with the line taut, rod in that dynamic curve, yet everything was different.  The trout, which had taken the nymph, had found a log along the bottom of the stream and swum under it; the hook of the girdle bug had gotten stuck in the log, allowing the fish to break the tippet and swim away.  All I could do was roll up my sleeve, reach down the leader as far as I could without going snorkeling, give a tug and break the tippet.  I was lucky that the tippet broke right where it was tied to the hook, and I didn’t have to perform major leader repair.

I caught a few more fish, including one that was just barely under 12 inches, and that fish went in the creel.  Careful measurement is required on this stream to observe the regulations, for there is a no-kill slot of 12 to 16 inches, meaning all fish in that range must be released.  You are allowed to keep five fish under 12 inches, or four under 12 and one over 16.  I don’t think I’ve ever caught a 16-inch trout in that stream.

Although brook trout were native to this region, the introduced “German” brown trout now predominates.  I’ve never heard or seen them referred to as an invasive species, though.


The ramps were indeed in prime condition on this 18th day of April, and I picked a nice sack full.  A spring trickles through the ramps patch, and this year it was wearing a lovely coat of green—nice, perky watercress.  I brought some of that home, too.  Also a few sprigs of mint growing along the streamside path, which I used to make a sort of julep with a bit of birch syrup and 2 Gingers whiskey.  I noticed other wild edibles:  garlic mustard (always referred to as an invasive species) and stinging nettles.  When I have ramps and cress I’m not that interested in garlic mustard, and I have nettles a’plenty all around the edges of my yard.


With the opening day’s bounty from stream and woods I made a simple, seasonal meal.  I fileted the trout, chopped the bones and put them in a saucepan with a chopped shallot, stuck that in a hot oven to brown up.  Then I added some white wine, chicken stock and water, and let it reduce and infuse, still in the oven.   


To anchor the plate I prepared a recipe I had never made before, “schupfnudeln” from David Bouley’s East of Paris.  It’s a sort of noodle-gnocci hybrid, a potato dough with egg and butter that you roll with your hands into short, thick noodles.  It was really easy to work with, and very tasty, and I’m thinking I may make a couple big batches to freeze, since I have a lot of potatoes in the basement that aren’t going to be good for much longer.


You boil the nudeln, then brown them in a fry pan.  For the fat I chopped a little of our home-smoked bacon.  As the noodles were starting to brown I tossed in a couple generous handfuls of chopped ramps, mainly the bottom white and red part.  I also chopped a good handful of the ramp greens and added these to some melted butter.  The butter I brushed on the skin side of the trout before sticking it in a hot convection oven, and cooked it until it just started to brown.


I added a little more wine and a little butter to the reduced stock/sauce at the end.  Laid down a bed of the lovely brown, fragrant, bacony noodles, some fresh cress on top of that, spooned the sauce over that, and crowned it with the trout.  


This, to me, is the sort of meal so emblematic of the way we live, of the way we have chosen to live and eat, that it’s beyond the realm of food criticism of any traditional sort.  But it was wonderful, and we cleaned our plates.

That’s my story of the first fishing outing, and first trout stream meal of 2015.  If you’ve made it this far, I thank and applaud you.  It’s a perennial story that I always feel is worth telling again.  I hope you enjoyed it.

Monday, March 4, 2013

Smoking Basics (The Hay River Transition Initiative Class Handout, with Some Additional Notes)

At the third Hay River Transition Initiative's Traditional and Green Skills Day, this past Saturday, I led a seminar on basic home smoking--"Low-Stress, Small Batch Smoking," I think I called it.  There was no pre-registration for the classes this  year, so I had no idea how many people would be attending my session.  Well, there were way more people than I expected, and so I had nowhere near enough handouts to go around.  So I'm posting the notes here, and will be getting word out through the various email lists that serve this beautiful area of Near North Wisconsin.  I'm sure there's info here that the general Trout Caviar readership can benefit from, too, though much of it has appeared here before.  I've added some notes that occurred to me after I put the handout together, as well. 

                                                
____________________________
Smoking was once a common means of preserving food, and still is in many parts of the world. In modern America we smoke for flavor more than preservation, and we’ve mostly turned the job over to large, industrial producers. It’s worth relearning the basics of home smoking.

You will need:

      *  A covered barbecue grill (mine is a Meco, clamshell type, though a Weber is also fine)
     *   A smaller grill, preferably also covered, to hold hot coals to replenish the smoker
     *   Natural chunk charcoal, available at most larger grocery or hardware stores (& Menard’s)
     *   A chimney starter for the charcoal (no lighter fluid, please)
     *   Some fragrant wood, chips or chunks (I use oak and apple; in the past I’ve used maple and hickory bark)
     *   An instant-read meat thermometer, inserted in the top vent, is handy for monitoring temperature

This technique is hot smoking, as opposed to the cold smoking that produces lox and certain other delicacies. It involves cooking the pre-cured (salted or brined) meat or fish rather slowly with indirect heat in the presence of smoke.

Light a chimney starter full of charcoal. When it’s ready, dump half the charcoal in the main grill, half in the smaller. Move the coals in the main grill to one side. Add some fresh charcoal to the smaller grill, and put the lid on with the vents open just a tad, so those coals stay hot but don’t burn up too quickly.
Place some smoking wood—apple, oak, etc., a handful of chips or a chunk or two—on top of the coals in the main grill. Place the items to be smoked on the side of the grill grate away from the coals: it’s important that the food isn’t directly over the coals. Put the lid on with the vent about halfway closed. Place the instant-read thermometer in the vent opening. Adjust vent and coals to keep the temperature around 200 to 225 degrees. Replenish with coals from the smaller grill as needed. Add more smoking wood chips or chunks as needed.

Fish of up to a pound will be done in 1 ½ to 2 hours; bacon in chunks of 1 to 1 ½ pounds will be done in 2 to 3 hours. Turn the meat or fish over every 45 minutes or so. At temperatures this low (even though it’s called hot smoking), it’s hard to overcook the foods. If, after smoking for the times designated, you’re not sure the food is fully cooked, just place it in a 200-degree oven for another thirty minutes.

It’s as simple as that. Once you’re comfortable with the basics, there’s no end of resources—books, TV series, classes, etc.—to take you on myriad smoking adventures. (One book I really like is Peace, Love, and Barbecue by Mike Mills.)

Some notes:

     *   Many smoking recipes tell you to soak the smoking wood. I don’t. The point of the smoking wood is to produce smoke, not steam.
      *   Remove the lid from the smaller grill about ten minutes before you want to add fresh coals to the larger grill. This step allows air in to perk up those coals, which are merely smoldering.
     *   While the salting and smoking provide a certain amount of preservative qualities, the finished products of these recipes are not intended for long-term storage. The bacon can be frozen, but the fish should be eaten promptly.
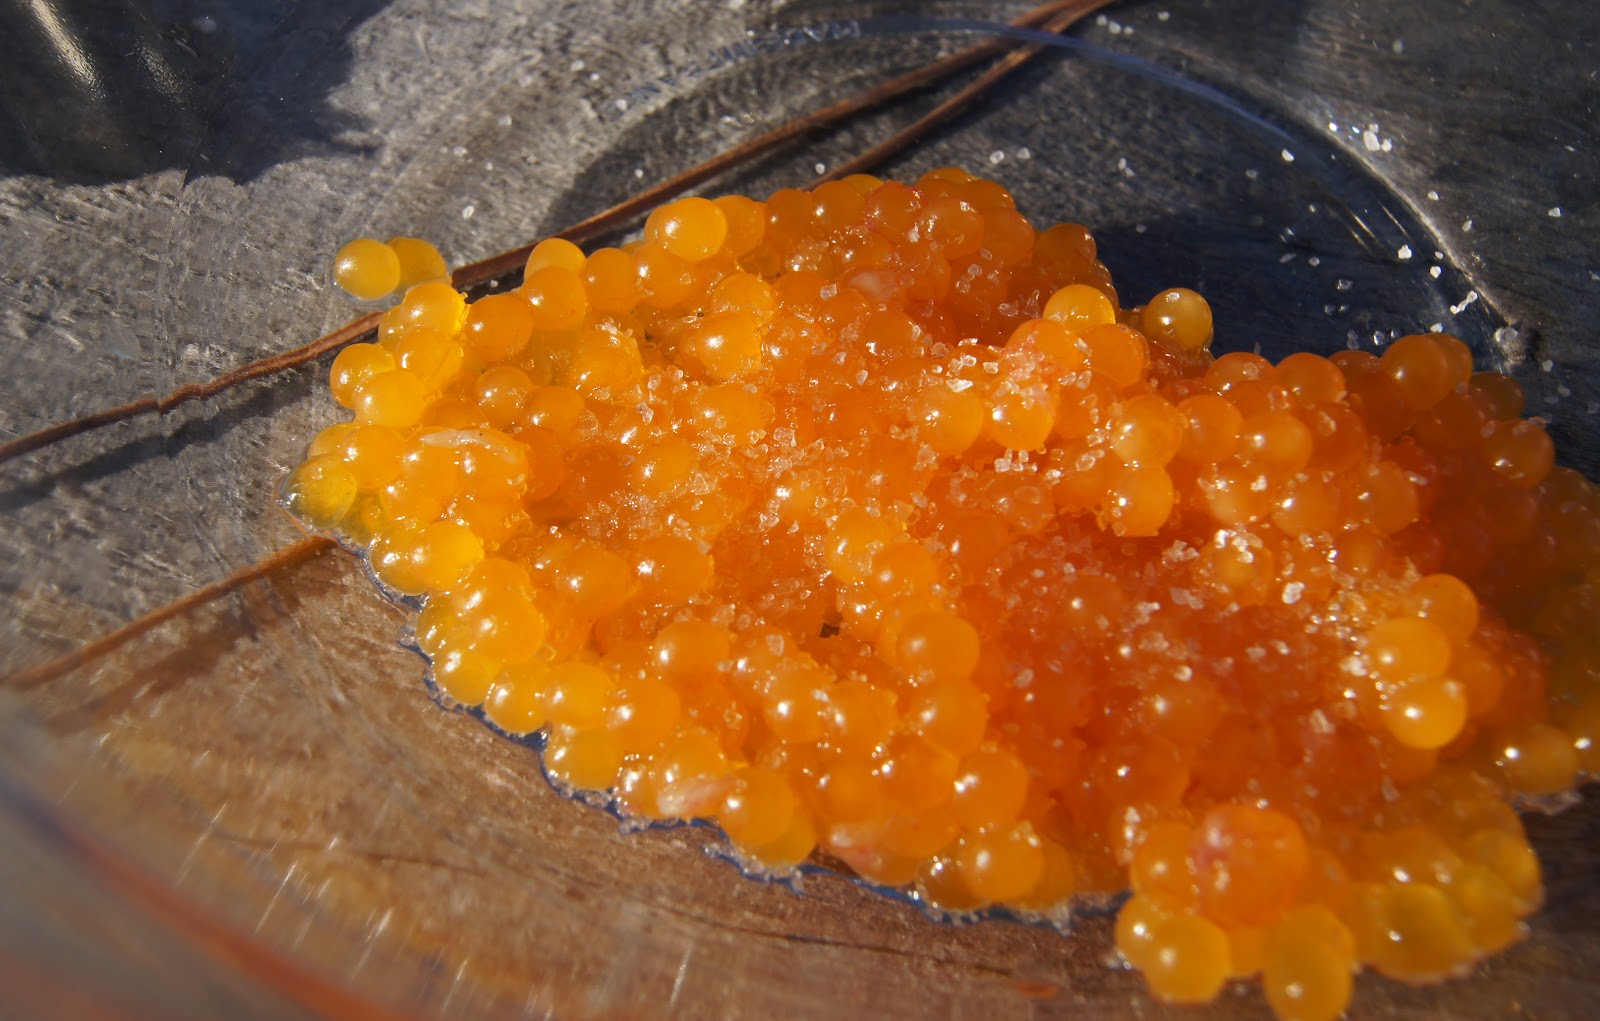
Home-Smoked Trout


I usually smoke brown trout because that’s mostly what I catch. If you’re buying trout, it will probably be farmed rainbow trout. I’ve also used this brine and method on lake trout and herring.

In a medium saucepan, heat 4 cups water and add ½ cup salt and ½ cup brown sugar, stirring to dissolve.

Remove from heat and let cool. I have added cracked peppercorns and/or herbs to the brine.  Try different flavorings if you like.

A 12-to-14-inch fish is ideal for smoking, but smaller or larger ones can be smoked, too. Just brine and smoke for a longer or shorter time, depending on size.  Given those ideal 14-inch trout, brine them, refrigerated, overnight. Fish smaller than 12 inches can take up sufficient brine in 4 to 6 hours. A couple of hours before you plan to smoke, remove the fish from the brine, rinse in cold water, and set them on a wire rack set over a baking sheet. Using wooden picks—first snip off the sharp ends so they don’t go right through the flesh—prop open the body cavity of the fish to allow them to smoke and cook evenly. Smoke at 200–220 degrees for 2 hours.

[Note:  I almost always smoke bone-in fish, but for this class I could only get butterflied rainbow trout--well, if I had planned ahead I could have order whole fish from either Star Prairie or Bullfrog "Eat My Fish" Trout Farm, but you know how things go sometimes.  I took the same approach with the butterflied fish as I would with bone-in fish, and...the results were not good.  Because the flesh of the boneless fish was more accessible to the brine, and had been cut up a bit in the boning process, the fish turned out much too salty--also, I left them in the brine too long when a round of errands kept me away from home longer than expected.  Since the final product was both  unpalatable and unattractive, I didn't even bring the fish to class--but I should have, to show that 1) even an experienced smoker can make mistakes, and 2) it's okay; it's just a couple of fish.  And, since the theme this year is "Charge ahead, fall down, get up, repeat," I turned lemons into lemonade, as it were, by turning my raggedy, too-salty trout into:

Delicious Smoked Trout Spread

1 smoked rainbow trout (it's okay if it's a bit too salty to eat on its own...(!))
Cream cheese
Hellmann's mayonnaise
1 scallion, chopped
Freshly ground black pepper

Remove the skin and any remaining fins and bones from the trout, and flake the fish into a bowl.  Add a couple of tablespoons of cream cheese, and mash the fish and cheese together until incorporated.  Add a generous tablespoon of mayonnaise and mix well.  Stir in the chopped scallion and pepper to taste.  Serve on crackers.

Moral of the story:  You can indeed smoke butterflied fish or fillets, but adjust the brining time accordingly.  Those butterflied trout of mine spent a good six to eight hours in the brine, but an hour on two would have done the trick.  These were small, thin-fleshed fish.  Another option for small, boneless fish or fillets would be to reduce the amount of salt in the brine, say to 1/3 or even 1/4 cup per quart of water, instead of 1/2 cup.]

 Home-Smoked Bacon

2 pounds pork belly
1/4 cup maple syrup or brown sugar
3 tablespoons salt

Rub the pork belly with the maple syrup, sprinkle salt on all sides, and let cure in the refrigerator for 24 hours, turning occasionally.  For the brown sugar cure, mix the sugar and salt and pat it evenly on all sides of the meat.
The next day, rinse off excess salt, pat dry, and smoke at 200–225 degrees for 2 to 3 hours. The bacon will be both smoked and fully cooked. If you are unsure about whether the bacon is cooked at this point, you can set your mind at ease by placing the bacon in a 200-degree oven for 30 minutes.  A meat thermometer inserted into the bacon should read 160 degrees. 
            I refrigerate my bacon wrapped in parchment paper, then placed in a small cotton sack, rather than in a plastic bag.  This allows air circulation and prevents mold and spoilage. [Note:  If  your bacon is properly cured and smoked, it will slowly continue to dry-cure when stored this way, turning into something rather like prosciutto or guanciale, the dry-cured Italian pork jowls; a few slices of this intensely flavored meat adds great depth to soups or stews, or can be thinly sliced and eaten on its own]  For freezing, use plastic zip bags.

[Note:  When I do demos like this I usually bring in pork belly in three different states of preparation:  raw, so folks can just see what the raw ingredient looks like; cured, having spent a day in a maple sugar and salt bath, because you can often see a change in the color and texture of cured meat from raw; and then I'll have a cured piece already in the smoker/grill so they can see the set-up.

When I get home with all these various meats, I'll usually freeze the raw belly, and the smoked piece becomes our in-use bacon, and then there's the cured but un-smoked piece left over.  Since by this time I've spent plenty of time having my person soaked in smoke, I usually turn that cured belly into roasted, smoke-free bacon--it's really a treat.

Pan Roasted Bacon simply involves cooking that cured belly slowly so that it has time to render a lot of fat and become tender, without burning the sugars from the maple syrup in the cure.  So, you just place the belly, fat side down, in a casserole or gratin dish, and roast it in a 300-degree oven for two to three hours, maybe more.  Turn it a couple of times while it roasts.  You should see a lot of fat rendering off, and the belly will turn a beautiful burnish golden brown.  After 2 hours it will be cooked, but you can let it go longer--depends on how tender you like it; I tend to cook it at least 3 hours.

And yesterday, since I'm mad for cooking on our new woodstove, I did a stovetop version that turned out great.  I placed the belly in a cast-iron skillet and let it sit most of the day on top of the stove, turning it from time to time.  I covered it at times, so it steamed a bit, and when the stove was too hot I set the skillet on a trivet.  At the end of the day we made Asian-style noodle soup with a broth made from the carcass of a smoked chicken (see below), with a couple of slices of that roasted belly on top, and we felt we were slurping in the best noodle shop around.]

[Note 2:  Since home-smoked bacon contains no unpleasant chemical ingredients, preservatives or colorings, the fat that accumulates when you cook it will be a lovely pure, creamy white, and full of flavor.  It's a great ingredient for cooking eggs or sauteing vegetables, or for using in place of shortening or oil in things like tortillas or biscuits.]

Smoke-Roasting


This is my own term for the process of grilling and roasting meats at somewhat higher temperatures than the hot smoked method described above.  I generally use it for pork—shoulder or country-style ribs—or chicken.  I have no specific recipes for this, because I tend to do it a little differently each time.  The basic method is this:
A few hours before you’re going to cook (or the night before), season the meat generously.  Salt is necessary, pepper is almost obligatory; I love thyme, so I’ll toss in a few sprigs of it most of the time—other herbs can also be used.  I may add a couple of crushed cloves of garlic, some sliced onion or shallot, sliced fresh or crushed dried chilies.  I’ll sometimes add spices like cumin, allspice, or fennel.  A spice blend that the French call quatre épices (“four spices,” though it often contains five or six) is excellent with pork or fowl.  Use it sparingly, as it can be overpowering.  This makes enough to last a good while:
           
2 teaspoons ground coriander
2 teaspoons ground allspice
1 teaspoon ground ginger
1 teaspoon ground cinnamon
½ teaspoon grated nutmeg
1/8 teaspoon ground cloves
           
 You can go for a dry rub, or more of a marinade, adding a bit of wine, beer, or cider, or just a little gloss of oil. 
            Prepare coals in your barbecue just as if you were going to grill, but spread the coals out over only half the grill.  Brown the meat well over direct heat, then move it to the area away from the coals.  Add some smoking wood to the coals, close the lid, and let the meat finish cooking in the smoky heat.  For either chicken pieces or country-style ribs, I’d give it at least 45 minutes, but a bit longer won’t hurt. 
            Sometimes at the end of the cooking I’ll boost the coals and crisp up the meat just prior to serving.  Smoke-roasted meats aren’t brined to the same extent as hot-smoked ones, and aren’t made for keeping.  Enjoy them hot from the grill, and use up any leftovers within a few days.

Smoked Venison “Pastrami”

2 teaspoons salt
2 teaspoons maple sugar or brown sugar
7 juniper berries, crushed
1 dried red chile, crumbled
¼ teaspoon powdered ginger
½ teaspoon ground roasted Sichuan pepper
½ thyme, fresh or dried
¼ dry mustard
1 teaspoon freshly ground black pepper
1 ½ - 2 pounds venison roast

Mix all the dry ingredients and rub them all over the roast.  Cover with plastic wrap and refrigerate for 2 to 3 days, turning a couple of time per day.  Smoke at 225 for 2 to 2 ½ hours.  I used wild black cherry wood when I made this, but any aromatic hardwood will work—apple, oak, maple.

Smoked Pork Shoulder Roast


1 tablespoons salt
1 tablespoon white or brown sugar
½ teaspoon dried thyme
½ teaspoon paprika
½ teaspoon freshly ground black pepper
1 – 2 to 2 ½ pound pork shoulder roast, with or without bone

Mix all the dry ingredients and rub the mixture evenly over the pork.  Refrigerate for at least 12 and up to 24 hours.  Smoke at 225 for 3 to 4 hours.  The internal temperature should be at least 160; finish in a low (250-275) oven if need be.

[Note:  This is excellent sliced thin and tucked into warm tortillas or Chinese steamed buns, with a fresh slaw and a bit of sauce or sour cream, depending on which ethnic direction you want to take it.  It's also wonderful served on a nice fresh roll, with perhaps a slick of mayo and some slices of dill pickle.

I prepared a small roast like this teh day before the class, to show and sample; it was the last preparation of the day, and well after dark by the time I got it going.  I smoked it for about 2 1/2 hours, then put it in the oven at 260 for an hour or so.  It turned out great.  I wouldn't call this dual-fuel method cheating, but rather, taking advantage of technologies both ancient and modern....  ]
 

Sichuan-Spiced Smoked Chicken

3 to 4 pounds chicken—you can use a whole, butterflied, or quartered chicken
1 tablespoon salt
1 teaspoon ground roasted Sichuan pepper
1 teaspoon freshly ground black pepper
1 tablespoon maple syrup
1 tablespoon soy sauce
1 dried red chile, crumbled
½-inch piece fresh ginger root, peeled and minced
3 garlic cloves, minced

Mix all the seasonings and rub the mixture over the chicken.  Refrigerate for 24 hours, turning the chicken occasionally in the marinade.  Prior to smoking, remove the chicken from the marinade and let it drain on paper towels.  Smoke at 250 for 3 ½ to 4 hours, until a meat thermometer inserted at the thigh reads 165. (You can put it in a 250-275 oven for the final hour--in fact, until you gain some experience with smoking poultry, I would recommend this method.  Undercooked poultry is something to be strenuously avoided.)

[Note:  This turned out a wonderfully fragrant and succulent bird.  I love Asian flavors in smoked poultry, but you could use more neutral seasonings if you like--white or brown sugar or honey could be used instead of the maple syrup.  If you omit the soy, add another 1 1/2 teaspoons of salt.  In summer I'll grab handfuls of fresh herbs for the marinade.

We've used this as a filling for steamed Chinese buns, and in quesadillas.  Yesterday, while the pork belly pan-roasted on the woodstove (see above), I also simmered a pot of smoked chicken stock which made the basis for a delicious noodle soup supper.  The concept was a chicken broth with pho-style flavors.  I stripped the meat off the bones and set it aside.  In a 3-quart saucepan I placed the bones, wing-tips, and some of the skin that had fallen off, along with:

several slices of fresh ginger root,
a couple cloves of garlic, crushed,
half an onion, sliced,
half a carrot, chopped,
2 or 3 whole cloves,
3 points of a star anise,
a teaspoon of whole Sichuan peppercorns (hua jiao),
a dried red chile, broken in half,
a few black peppercorns,
8-10 dried black mushrooms

I covered all with 2 quarts of water (about).  It simmered very gently all day.  It was reducing too much at the start so I added a little more water and covered it with the pot lid just ajar.  At the end I poured the contents of the saucepan through a colander into a big mixing bowl to remove the large solids, washed my saucepan, and poured the broth back into the pan through a sieve lined with a piece of old dish towel--this makes an excellent cheesecloth substitute, a superior one, in fact.  From the solids in the colander I retrieved the mushrooms, sliced them and returned them to the broth.

We boiled up some thin Chinese noodles, blanched some sliced red cabbage and julienne carrots; warmed some of the smoked chicken meat and slices of pork belly in a skillet; divvied it all up and garnished with sliced scallions and ground roasted Sichuan pepper.  I made a dipping sauce for the meats from soy, Chinese dark vinegar, sugar, chile oil, a minced clove of garlic, more Sichuan pepper, and I thinned it with a little water.] 


Beef Jerky


1 pound lean beef, such as top round
1 teaspoon salt
1 tablespoon soy sauce
1 tablespoon maple syrup
1 tablespoon canola oil
1 tablespoon water
1 teaspoon sambal oelek chile paste  (or sriracha, or a few shakes of Tabasco sauce)
1 clove garlic, minced
½ teaspoon freshly ground black pepper

Slice the meat against the grain into ¼-inch slices.  In a large bowl combine all the other ingredients.  Add the beef and mix well.  Refrigerate for 6 to 8 hours, stirring occasionally.
Lay the beef slices out on a metal cooling rack with a 1/2-inch or smaller grate.  It’s okay if they overlap a bit at the beginning, since they’ll shrink as they smoke, and you can spread them out partway through.  Place the rack on the grill grate in your grill/smoker.  Smoke at 225 for 2 hours, or until the jerky is done to your taste. You can finish it in a low oven to your desired chewiness.

______________________________________

Some material in this handout is quoted from Trout Caviar: Recipes from a Northern Forager by Brett Laidlaw, copyright 2011, published by the Minnesota Historical Society Press

All material copyright 2013 by Brett Laidlaw

Thursday, October 4, 2012

Fried Trout & Chowder


The Feast of the Fishes continues as we work our way through my catch of closing week.  It was a remarkably benign week of weather for the end of September--a bit of a disappointment, really, as I enjoy fishing at least one day at season's end in a chill rain, which clears the river of most other fisherfolk, and seems to pique the trout's appetite.  With clear, sunny skies and daytime highs pushing well into the 70s, the weather didn't really make one think of chowder--except that mornings started out in the low 30s, and sunset saw the temperature drop quickly into the 40s.  It was weather I'd associate more with a high, dry mountain climate than with valley life here in Near North Wisconsin.  The long story short: though the afternoon sun had me thinking of grilling, I knew that by suppertime we'd be pulling on the wool socks and sweatshirts; so I made chowder.


My first thought as I started to prep the dish was to do something a little fancy, a bit "deconstructed," if you will--with large pieces of bacon and thick slices of potato in a sort of "chowder sauce," the fish cooked separately.  That proved to be just too much to think about at the end of the day, so I made a fairly traditional chowder. The only divergence was that I fried the fillets of trout and served them atop the chowder, rather than simmering the fish in the soup; I like the crisp skin of a well fried trout very, very much.

Oh, and I did get a bit creative with the garnish, because (all together now!), "It's all about the garnish!"  I peeled and seeded a Green Zebra and a red tomato and chopped these roughly--a concasse, which is a nice French cooking word to know.  I also fried some shredded kale in the pan I cooked the trout in, cooked it quite crisp.


I've heard brook trout referred to as "northwoods bacon," and with these little babies the analogy is easy to see.  It's especially nice when you can have bacon with your "bacon."  That's actually a brown trout tidbit I'm holding.


If you're not starting with whole fish, and therefore don't have the frames to add flavor to the soup, use fish, chicken, or vegetable stock instead of water--or just don't worry about it, as the bacon and all the vegetables will provide quite a bit of flavor on their own.


Fried Trout & Chowder


2 ounces slab bacon, cut into 1/2-inch cubes
1/2 small red onion, sliced longitudinally
1 small leek, well washed and sliced, white and light green parts
1/4 cup fresh fennel bulb in 1/4-inch dice
1/4 celery root in 1/4-inch dice
1 small jalapeno chile seeded and chopped fine
1 heaping tablespoon flour
1 1/2 cups water
1 1/2 cups whole milk
fresh thyme
salt and pepper
2 small trout, about 8 ounces each, filleted, save the frames
2 medium red potatoes, in 1/2-inch cubes
1 medium Green Zebra tomato, peeled, seeded, chopped
1 medium red tomato, peeled, seeded, chopped
6 leaves kale, thick stem removed, sliced into 1/2-inch ribbons


Start to render the bacon slowly in a medium saucepan over medium heat.  If the bacon is lean and not giving up much fat, add a bit of cooking oil.  Add the onion and leek as the bacon begins to brown.  Cook a few minutes until the onion is translucent.  Add the fennel, celery root, and jalapeno, and cook, stirring, for two minutes.  Sprinkle the flour over the vegetables and stir it in to the fat in the pan.  Cook, stirring, for about a minute.

Combine the water and milk and gradually add it to the pan, scraping with a wooden spatula to dissolve the flour into the liquid.  When all the liquid is added, add the fish frames--bones and heads--to the pan, bring to a boil, and simmer for 15 minutes.  Fish out the fish frames; save the cheeks for garnish.  Add the potatoes and a couple sprigs of fresh thyme.  Add a couple generous pinches of salt.  Simmer another 15 minutes or so, until the potatoes are tender.  Taste for salt and add a few grinds of black pepper.

Season the fillets with salt and pepper.  Fry them in just a bit of oil--or bacon or duck fat--over medium-high heat, skin side down, for about three minutes, until the skin is nicely browned.  Flip them and finish cooking flesh side down for about two minutes.  Add a little more oil or fat to the pan, and fry the kale until it is crisp.

Serve a ladle or two of the chowder out into wide soup plates, top with the fried fish, garnish with the cheeks, both tomatoes, and kale, and serve.

Tuesday, October 2, 2012

How to Make Trout Caviar


The stream trout season on Wisconsin's inland waters closed at midnight this past Sunday, September 30.  I made up for a disappointing fishing year by logging some serious stream hours during the last week and a half of fishing--my shoulders are still aching from hours of wearing an overloaded fishing vest into which I had stuffed every fly box I could find, containing everything from teeny, tiny size 24 midge patterns to two-inch long streamers and weighted, rubber-legged girdle bugs, because, well, you never know what you might need, and in late September fishing you may be called upon to switch tactics radically in the space of an hour.  There are hatches of miniscule mayflies and midges which bring trout to feed selectively at the surface, in which case one must be able to match the hatch very closely; and then, the fish feel fall coming on, and the spawning season, so they are feisty and hungry, and can be tempted to go after those flies that represent a much bigger meal.


The latter tactic proved most successful for me in the waning days of the season, so I was able to add yet more weight to the vest in the form of trout, mainly browns.  And some of those fish turned out to be hen trout of breeding age, which gave me the opportunity to prepare what around here we refer to as "The Titular Delicacy," i.e., trout caviar.


I often say that the hardest part about making bacon is finding a source for pork belly; similarly, the hardest part of making trout caviar is coming into some trout roe.  If you live near a trout farm, you may be able to get some there--I've obtained rainbow trout roe from the Star Prairie Trout Farm in the past.  If you fish for Great Lakes salmon or steelhead, or know someone who does, the roe of those lake-run fish can be treated the same way that I prepare the roe of brown and brook trout from my local streams.  Here's the somewhat messy process that results in a truly exquisite treat:


When you open up a mature female trout at this time of year you find the body cavity packed with roe contained in egg sacs surrounded by a clear, veined membrane.

My hands are clean, but stained from working with black walnuts!

And now I must digress a bit, because in trying to nail down the terminology of caviar, I've just gone down a bit of a rabbit hole.  I used to think the membranous sac surrounding the roe was called a skein, but I've now come to think that skein refers to the eggs themselves.  Skein in general refers to a loose agglomeration of things--often a loosely gathered bunch of yarn or thread, or in another common usage, it refers to geese:  "One swallow does not make a summer, but one skein of geese, cleaving the murk of March thaw, is the Spring." — Aldo Leopold.  In none of the online dictionaries that I consulted did I find any reference to fish roe, nor was that usage listed in the venerable Oxford English Dictionary, print version.  However, there are plenty of references to skeins on various fishing-related sites, and a quick survey of some of these reveals much confusion as to what skein actually means.  I've found it used to mean the membrane, the roe, and the two combined.  Therefore, I am going to eschew using it at all, and just refer to the sac, and the roe.  Thanks for your patience.


I used to think the sac was gray, but Mary helped document the caviar making process this time, and she cleverly pointed out that it's actually red.  I have this little color blindness thing going on, so I can sometimes miss details like that.  When Mary mentioned the color of the sac, it immediately made sense to me: there are veins in the sac that carry blood, probably to bring oxygen to the eggs, so I guess it's an organ, not just a functional material.


What you want to get rid of. 

Besides obtaining your roe to start with, separating the sac from the eggs is the only difficult part of the process.  The sac is delicate, so it breaks easily as you try to carefully scrape away the eggs.  The more you do it, the easier it becomes.  I use the dull side of a couple of paring knives to separate eggs from sac.


You're going to break a few eggs, but the eggs, in fact, are pretty sturdy.  You just go at it confidently, working quickly but carefully.  It's not necessary that the eggs be totally clean of membrane at this point, as you can pick out any stray pieces after rinsing.


The water turns pink and cloudy as bits of membrane and blood are rinsed away.


Rinse a couple of times, and drain well.


Weigh the roe.  That's just about an ounce, 29 grams.  That might not seem like a lot, but this roe was from a  pretty small fish, just a 12-inch brown.  And the caviar is rich; a little goes a long way.


The salt should be a bit less than 10 percent of the weight of the roe--in the book I say 4 grams salt--that's a scant quarter-teaspoon--to 50 grams of roe.  I didn't quite trust my Ikea scale to accurately weigh two grams of salt, so I went with the volume/eyeball method, and lightly coated the surface of the roe with salt.  That turned out to be the perfect amount.  This batch of caviar was nicely cured and not at all too salty.  We enjoyed it as part of my birthday raw foods dinner, along with a plate of lovely oysters, and steak tartare.  I share my birthday, October 1, with Rod Carew, the People's Republic of China (which made for quite a gala day for me, the two years I passed my birthday in Chengdu), Julie Andrews, Vladimir Horowitz, and Bonnie Parker (of Bonnie & Clyde!).  That it falls the day after closing day takes a lot of the sting out of seeing another fishing season come to an end.


Trout caviar will keep for around a week--in the book I say four to five days, playing it safe.  But it's best eaten fresh, within a day or two.  The salt will permeate the eggs within a few hours, so you can make it in the afternoon and eat it that evening.


I think it should be easy to see why I'm so enthusiastic about this stuff.  On a thin slice of homemade sourdough rye, with some Hope butter and a dab of a goat yogurt-cream mixture flavored with shallots and black pepper, it made a delectable bite.  I have the roe from two trout killed on closing day to salt and consume, and then I'll have to wait until next autumn to enjoy it again.  It's worth the wait.


Text and photos copyright 2012 by Brett Laidlaw